- person Penulis:
-
 Dimas Maryanto
PT. Tabeldata Informatika
- account_balance_wallet Donasi via:
- Saweria a/n Dimas Maryanto
- lock_open Join Premium Members:
- Udemy.com
-
Daftar Materi
-
1. Pengenalan Docker 8
-
2. Docker Registry 3
-
3. Docker Container CLI 8
-
1. Docker CLI (Command Line Interface)
2. Management Docker Container
3. Management Docker Images
4. Run a command in a running container
5. Expose services to outside using ports
6. Copying files/content between container and filesystem
7. Logging, Inspect, & Resource Usage Statistics Containers
8. Run a Container using Environtment File
-
4. Docker Networks 7
-
5. Docker Volumes 5
-
6. Dockerfile 15
-
1. Build Docker Image Overview
2. Usage docker build
3. FROM Instruction
4. Environtment Replacement
5. Copying Resources
6. Excluding files/directories
7. Label Instruction
8. Execution Instruction
9. CMD vs ENTRYPOINT?
10. Exposing Ports
11. User, Volumes and Working Directory
12. Health Check Instruction
13. Multiple Stage Builds
14. Best practices for writing Dockerfiles
15. Best practices for scanning images
-
7. Study Kasus: Build docker image 14
-
1. Build specific docker image by programming languages
2. Build Docker Image for Java Webapp
3. Build Java Web using maven-docker-plugin
4. Build docker image for spring-boot
5. Springboot - using Environtment
6. Springboot - where data such as files/images we stored?
7. Springboot - Using Database
8. Build docker image for Angular Project
9. Angular - Access Rest API
10. Angular - Proxy to backend
11. Build docker image for PHP
12. Build Docker image for Laravel Framework
13. Laravel - Using Frontend & Rest API
14. Laravel - Using Database
-
8. Docker Compose 19
-
1. Overview of Docker Compose
2. Get started with Docker Compose
3. Overview of docker-compose CLI
4. Compose file specification and syntax
5. Environment variables in Compose
6. Volume in Compose
7. Share data between Containers in Compose
8. Using sshfs for share data in Compose
9. Using NFS for share data in Compose
10. Networking Overview in Compose file
11. Network links in Compose file
12. Specify custom networks in Compose file
13. Dependency between services in Compose file
14. Build docker image using Compose file
15. Using profiles with Compose file
16. Multiple Compose files to Add & Override attribute
17. Example use case of multiple compose files
18. Scale services using compose command
19. Use Compose in production
-
9. Study Kasus: Docker Compose 7
-
10. Docker Context 8
-
11. Study Kasus: Docker for CI 8
-
1. Overview of Study Cases using docker for CI
2. Setup environment for CI using Gitlab & Nexus OSS
3. The `.gitlab-ci.yml` file
4. Pipeline: PHP deployment using Gitlab CI
5. Pipeline: Java Web deployment using Gitlab CI
6. Pipeline: spring-boot deploy with Gitlab CI
7. Pipeline: Angular deploy with Gitlab CI
8. Pipeline: Laravel deploy with Gitlab CI
-
12. Docker Machine 7
-
13. Study Kasus: Ansible for Docker 4
-
14. Docker Swarm
- Materi: belum tersedia...
-
15. Study Kasus: Docker Swarm
- Materi: belum tersedia...
-
16. Docker on Cloud using GCP
- Materi: belum tersedia...
- Lastest Posts
-
 09 Apr 23
Working with Deployment object
-
 26 Feb 23
Study cases: Microservice apps (...
-
 05 Feb 23
Welcome to the Nutanix HCF (Hybr...
-
 04 Feb 23
Silabus SRE - Nutanix AHV: Pemul...
-
 17 Jan 23
What is Workload Resources?
-
 17 Jan 23
Overview Kubernetes Workloads re...
-
 15 Jan 23
Getting started with Transaction...
-
 14 Jan 23
Overview of Concurrency Control
-
 14 Jan 23
Time your practice (part 3)
-
 08 Jan 23
Cleanup Data from Table
Installing Nexus OSS
Hai semuanya, di materi kali ini kita akan membahas Insecure Registry dengan menggunakan Nexus OSS, diantaranya yang akan kita bahas yaitu
- System requirement to install Nexus OSS
- Installing Nexus OSS
- Setup Proxy Repository Docker from Docker HUB
- Setup Proxy Repository Docker from other registry
- Setup Hosted Repository Docker
- Setup Public Group Repository Docker
- How to Push & Pull Docker images from Insecure Registry
- Pulling docker image from Docker Hub using Proxy
- Pulling docker image from an other registry using proxy repository
- Push own docker image to hosted registry.
System Requirement
Untuk install Nexus OSS, kita bisa install di Windows, Mac, atau Linux dengan system required seperti berikut
- Java runtime environtment
- RAM, The default JRE min and max heap size of NXRM3 is pre-configured to be 1200MB, which should be considered an absolute minimum. The codebase will consume approximately another 1GB. So factoring in operating system overhead you will need at least 4GB of RAM on a dedicated NXRM host, assuming no other large applications are running on the machine.
- CPU, NXRM performance is primarily bounded by IO (disk and network) rather than CPU. So any reasonably modern 4 core (or better) CPU will generally be sufficient for normal uses of NXRM.
- Storage, Nexus Repository Manager 3 installed consumes around 500 MB.
Installing Nexus OSS
Sekarang kita install, karena disini saya menggunakan Server Linux Centos 8, berikut adalah cara installnya
- Download nexus sonatype oss
- Setelah filenya di download, kemudian extract dengan perintah berikut
- Pindahkan ke lokasi yang diiginkan, sebagai contoh saya pindahkan ke
/optseperti berikut - Buat user
nexusdi linux - Kemudian kita buat service file dengan nama
nexus.servicedi folder/etc/systemd/systemseperti berikut - Yang terakhir kita jalankan servicenya
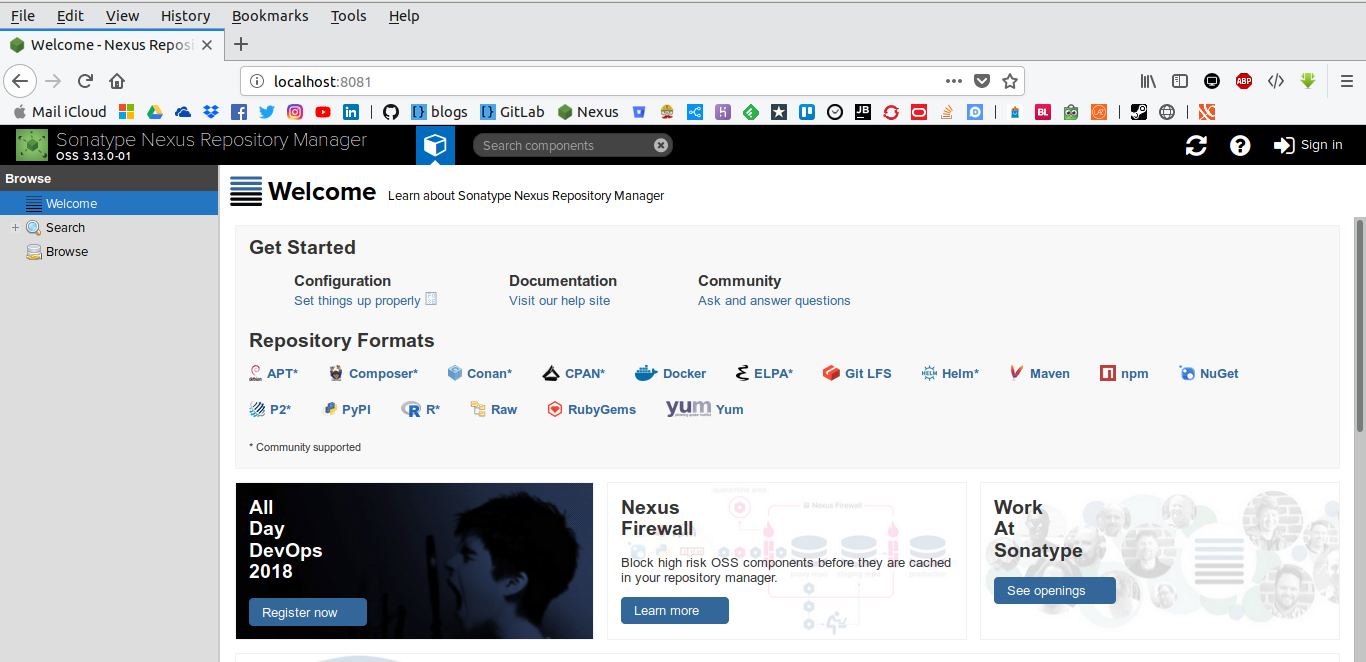
Kemudian coba akses, http://localhost:8081 maka hasilnya seperti berikut:
Configure Docker Registry
Untuk membuat registry di nexus kita perlu login dulu sebagai Administrator, secara default user admin passwordnya adalah admin123. setelah itu pilih Setting seperti berikut:
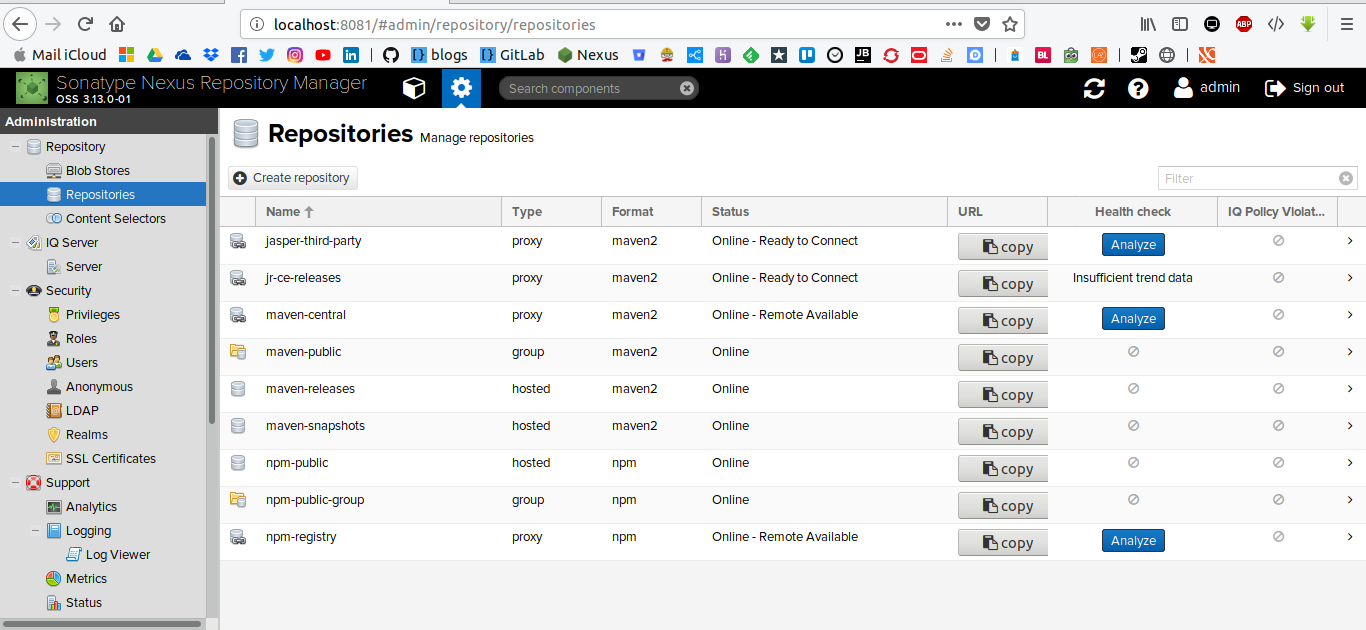
Setelah itu kita akan membuat repository, Ada 3 tipe repository
- Proxy, digunakan sebagai mirror registry dari public atau private registry lain.
- Hosted, digunakan untuk menyimpan image yang kita publish/push
- Group, digunakan untuk mengelompokan proxy dan hosted registry.
Jadi kita akan buat semuanya,
Setup proxy registry
Pertama kita buat dulu proxy registry. Dengan cara seperti berikut:
Create new repository -> docker (proxy)
Kemudian isi form seperti berikut configurasinya:
- name [bebas tapi harus di isi]:
docker-registry-io - online: di checklist
- remote storage [boleh pake registry lainnya]:
https://registry-1.docker.io - Docker Index [pilih]:
Use Docker Hub - Blob store [pilih bebas]:
default - Setelah itu click Save
Setup hosted registry
Setelah itu, kita setup untuk menyimpan image yang kita miliki ke private-registry dengan menggunakan docker (hosted)
Create new repository -> docker (hosted)
Kemudian isi form seperti berikut configurasinya:
- name [bebas tpi harus di isi]: docker-repository
- online: di checklist
- HTTP [di checklist dan di isi port contohnya]:
8087 - Allow anonnymuous docker pull [di checklist klo mau yang bisa ngepull tanpa login]: uncheked
- Enable Docker V1 API [docker engine version]: unchecked
- Deployment policy [Tergantung kebutuhan, klo saya pilih Allow redeploy supaya tanpa ganti tags]: Allow redeploy
- Setelah itu di Save
- Kemudian kita allow/open port
8087dari firewall supaya bisa di access
Setup group registry
Group repository, untuk mengkases ke-2 repository yang telah kita buat dalam satu port connection saja.
atau kita bisa pisahkan misalnya yang push repository menggunakan port 8087 sedangkan yang pull bisa menggunkan group repository ini.
Create new repository -> docker (group)
Kemudian isi form seperti berikut configurasinya:
- Name [bebas, tapi harus diisi]: docker-repository-public
- Online: checked
- HTTP:
8086 - Allow anonnymuous docker pull [di checklist klo mau yang bisa ngepull tanpa login]: uncheked
- Blob store: default
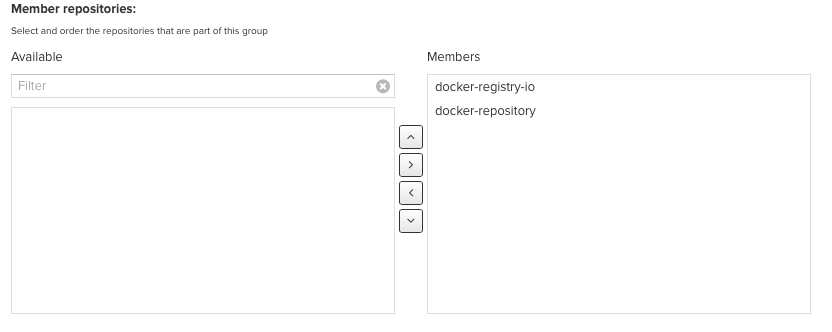
- Member repositories: pilih semua repository yang kita telah buat seperti berikut:
- Setelah itu kita Save
- Dan yang terakhir sama seperti sebelumnya, kita allow/open port
8086
Setup authentication
Sekarang kita setup untuk authenticationnya, kita bisa menu Security -> Users Kemudian kita buat usernya
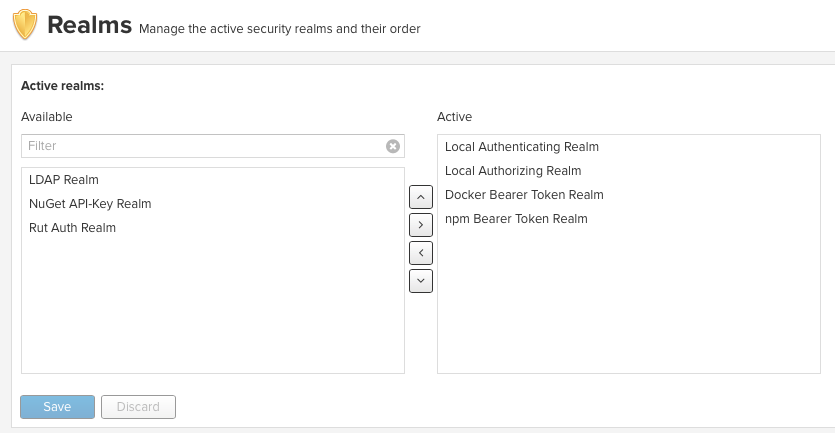
Setelah membuat user kita setup untuk Realm di menu Security -> Realms untuk mengaktifkan pull tanpa login ke docker dulu, dengan cara Aktifkan Docker Bearer Token Realm seperti berikut:
Configure insecure-connection
docker-engine hanya mengijinkan kita untuk melakukan pull/push dari registry docker itu sendiri, jadi kita harus daftarkan di docker-engine jika di mac kita bisa tambahkan dari Docker-Desktop -> Preferences -> Daemon -> insecure registries inputan [ip-nexus-server:http-connection] contohnya: localhost:8086, localhost:8087, domain.com:8087 dan lain-lain Setelah itu Apply & restart
Atau jika menggunakan linux:
Buat atau tambahkan ke file /etc/docker/daemon.json seperti berikut
Kemudian restart docker dengan perintah seperti berikut:
systemctl restart docker.serviceTesting login
Sebelum kita, melakukan pull & push kita harus login dulu ke private registry tersebut dengan perintah berikut:
Username: User yang kita setup di nexus repositoryPassword: input passwordnya dari user tersebut
Jika ada message: Login Succeeded berarti anda sudah bisa melakukan push ke repository
Setelah itu, kita contohnya kita akan pull image postgresql:9.3 dari private registry. berikut adalah perintahnya:
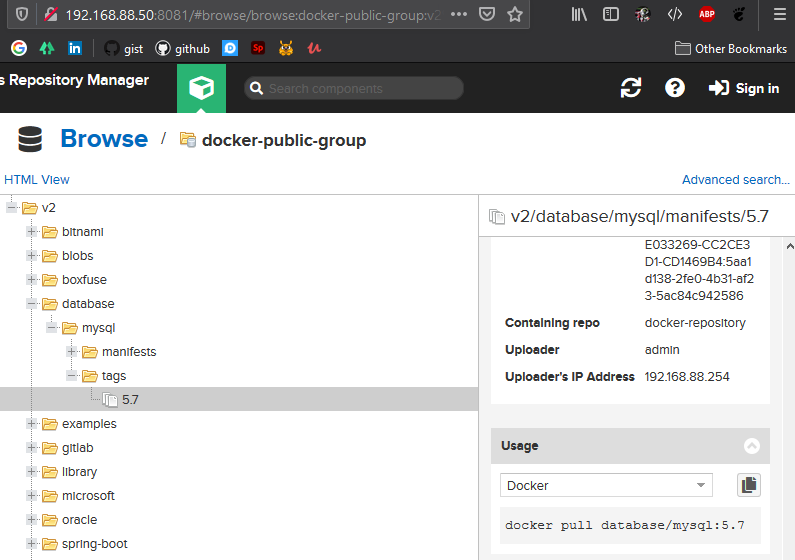
Dan sekarang kita coba push back ke private registry
For Bash script:
For Powershell script:
berikut hasilnya:
Yuk simak juga videonya,
Dan jika temen-temen belajar hal baru kali ini jangan lupa buat Like, Subcribe, dan Share ke temen kalian. Terimakasih!!!

